Oh my goodness, it was a lot of work, 3 days off and on, but I’ve totally cleaned and re-organized the studio!!!! It feels fantastic!
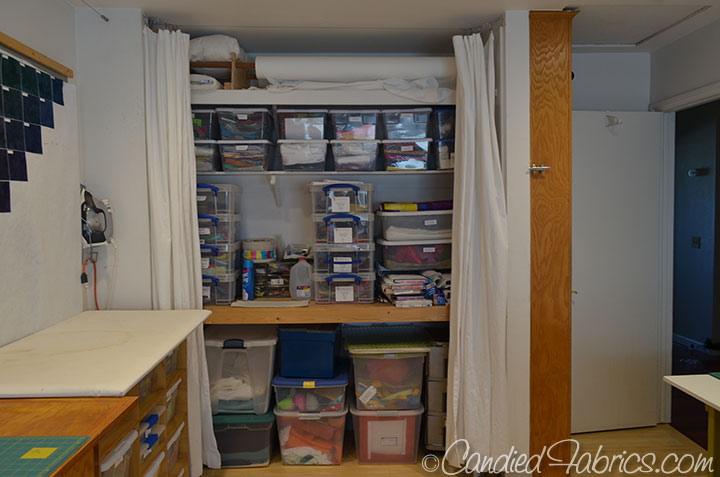
2 days after Christmas it looked like this:
As I told somebody the other day: “it’s always darkest before the dawn!”
My studio has a built in bookcase and desk. When I first moved in, I folded and folded fabric and stacked it all nicely on the bookshelves that you see just when you enter the room:
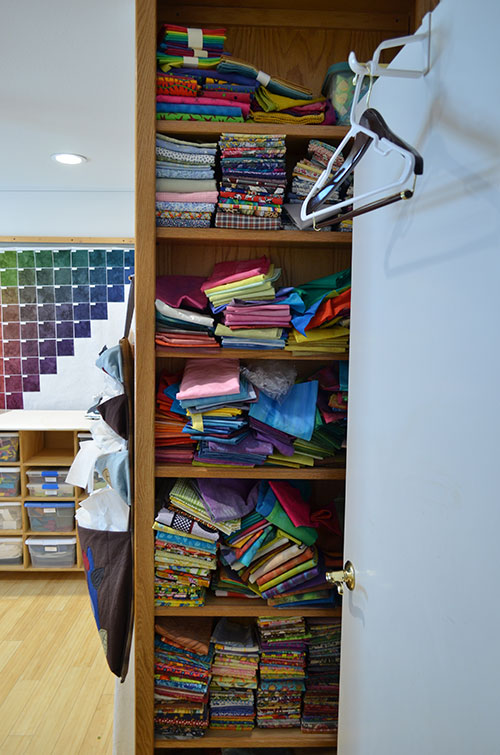
I fold longer pieces of fabric by folding the selvedge edges together and then I wrap them around a 6″ x 24″ ruler and then fold that 6″ x 22″ to fit on a shelf. These bookshelves are a couple inches too small to fit these folded pieces of fabric when they are folded in half, so I’ve got to fold them a second time. This gets old, so the pretty stacks started to look not so pretty if I used them. (You can see that I haven’t used the commercial print fabrics, they’re still neat and tidy).
So, these bookshelves are housing fabric that I don’t use and fabric that’s a pain to fit on the shelves…not the best use of these.
Now, the shelves around the desk are a bit deeper, I can fold those larger pieces of fabric in half and fit them on the shelf. These shelves are the most accessible (except the shelves above the window), and they are not facing the window so I don’t have to worry about sun bleaching fabric on the shelves, so maybe I should be storing the things I use the most here???
Yes, that is what I decided to do. First, I pulled out all the fabric and divided into 3 piles: commercial prints I don’t want, commercial prints I’m not ready to part with, and hand dyed fabric in colors not assigned to one of my current palettes. Each pile filled a huge laundry basket to overflowing. My friend Liz took the first basket, the commercial prints I want to keep were relegated to very low use storage – in the back part of those doors on the lower right of the desk.
I then went searching for plastic bins that would fit well and use a lot of the vertical space on each of those shelves around the window. Once found, I filled bins for over the window with hand dyed fabric that I’m not using in current color palettes. The bins let me fit more fabric, especially when they’re fat quarter sized, and keeps the dust away. The shelves that are most accessible will now hold fabric the way I use it: when I have large pieces of fabric, I fold it and then unfold it and lop off a what I need – and then I keep the smaller pieces in plastic bins, one bin for each color palette.
OK, enough explaining why I organized the way I did, let me show you!
Here’s the bookshelf, with…books on it! (I know, a novel concept). And there’s room for more books (and DVDs) on it. I’ve decided that once these are full, I’ll have to cull from what’s there to add more!
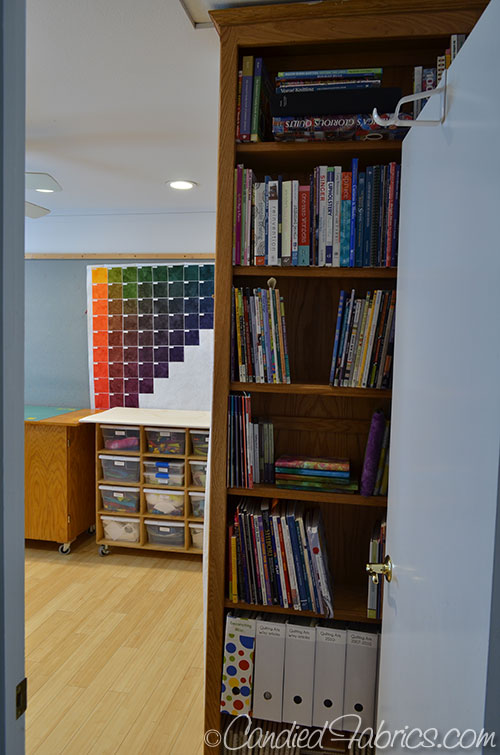
When you walk in there’s my design wall:

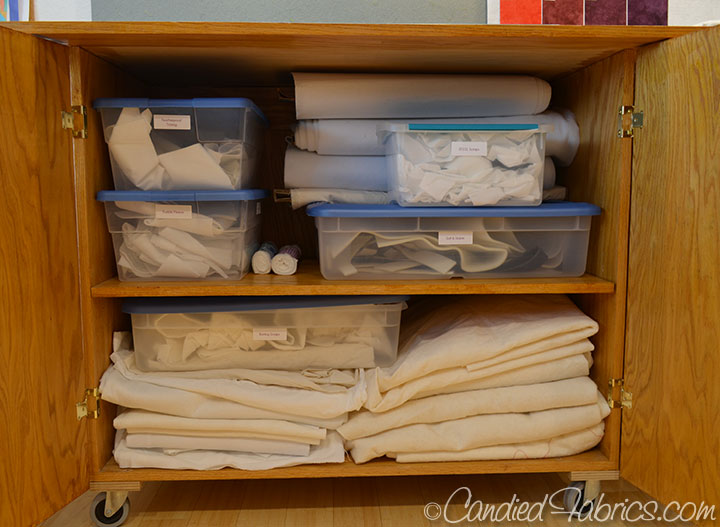
with my cutting table and ironing cabinet rolled in front of it. They mostly stay there, but can roll out of the way when I need the whole wall. I organized what I store under the cutting table (batting, muslin, bolts of fusible fleece and peltex, containers with scraps of interfacing and Soft and Stable). Excess bags of batting live way up high in my laundry room.
Because I organized that, the closet now works a lot better!
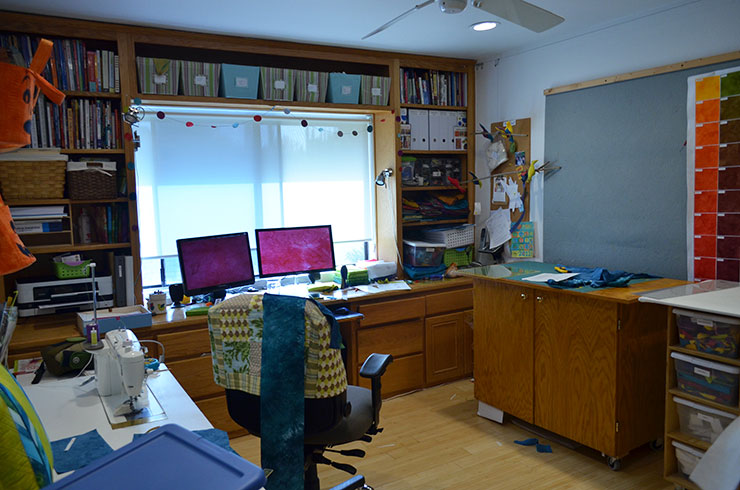
Here’s the newly organized desk wall!
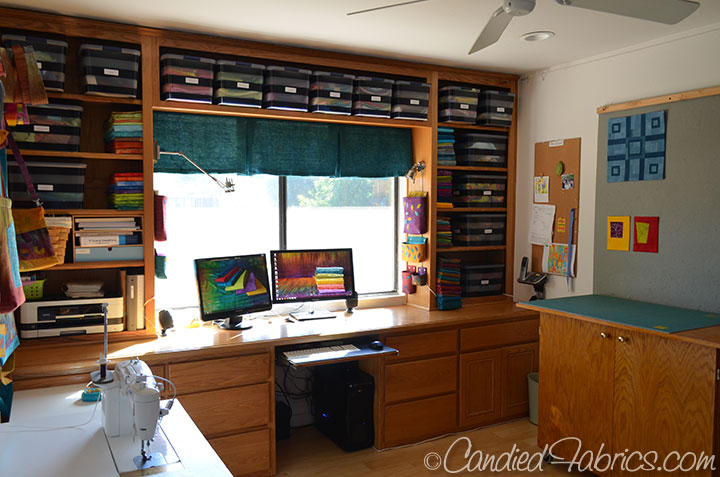
I condensed everything I need for the printer in those 2 shelves on the left:
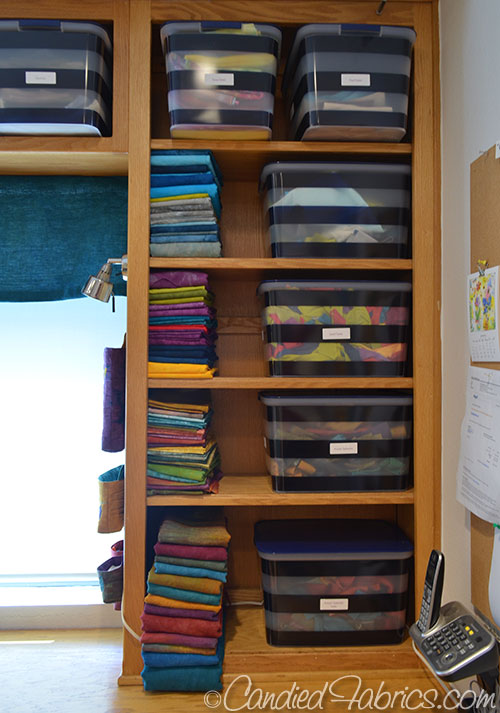
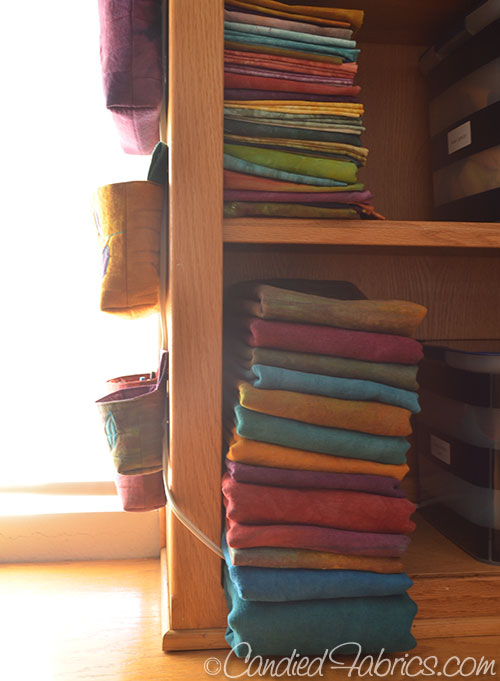
Each shelf is devoted to one color palette I’m using right now. All those bigger pieces of fabric fit folded in half on the shelves easily (except the linen which is 54″ wide – those pieces stick out some which is why I put them on the bottom shelf.) (Also, they’re the prettiest to me, so there’s that as well!)
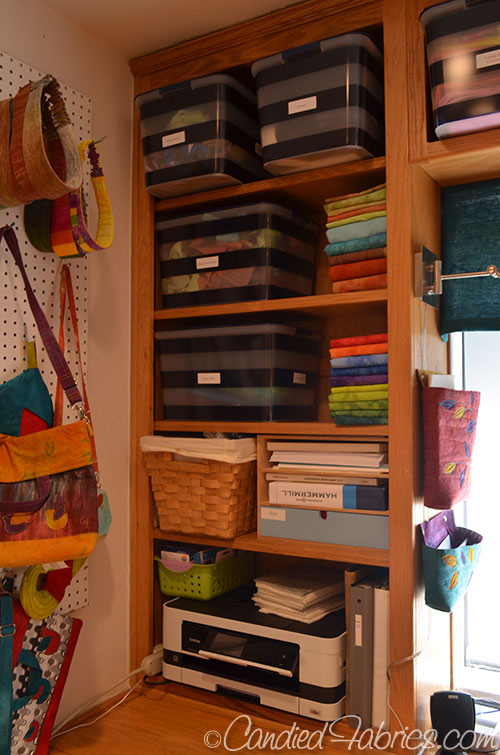
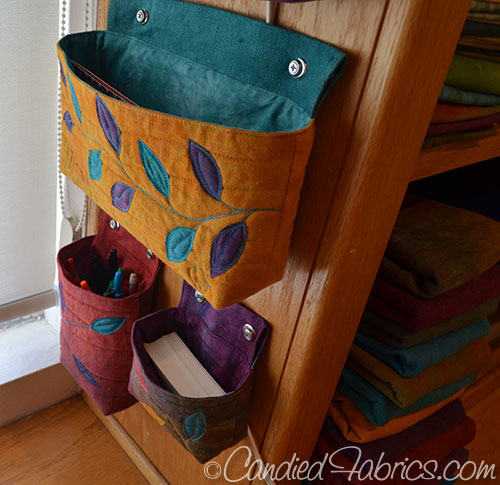
In order to keep the desk surface clean, I made some of my hanging organizer baskets for those shelf sides. (Bonus: 2 were already made, they were step outs for magazine and TV stuff!) On the left is a basket for household bills and family papers:

On the right are baskets for my business papers, bills, pens & pencils, and business cards. Aren’t those tiny ones cute??
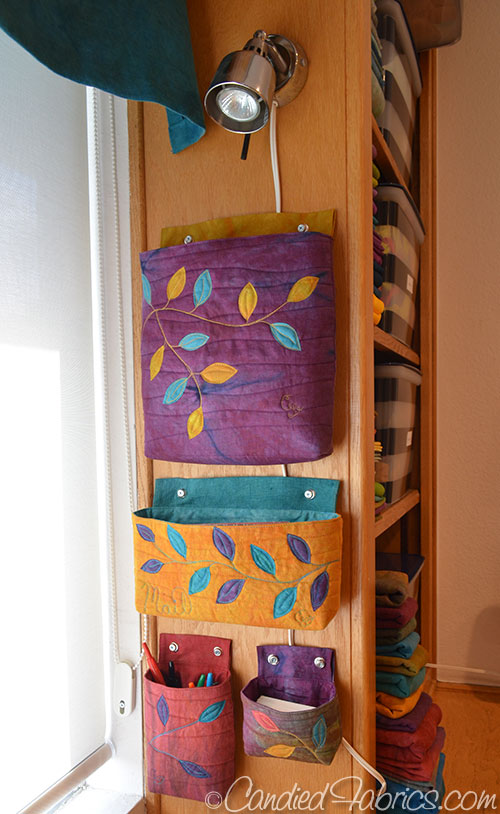
Instead of hanging them, I inserted grommets and hubby screwed them to the sides:
To the left of the desk is my sewing machine wall. Thread storage works fabulously in that white chest of drawers (more info on how I organized my thread is here):
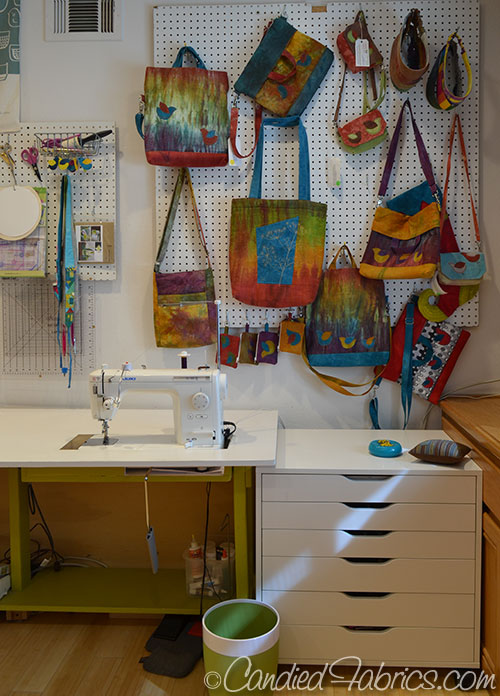
And here’s my Juki and pegboard full of scissors, rotary cutters and rulers! (My Bernina lives underneath, but there’s a cutout just her size on the left side of the table should I need her talents!)

Ah, there’s nothing better than stacks of fabric – unless it’s stacks of fabric that I’m actually using and being inspired by every day!


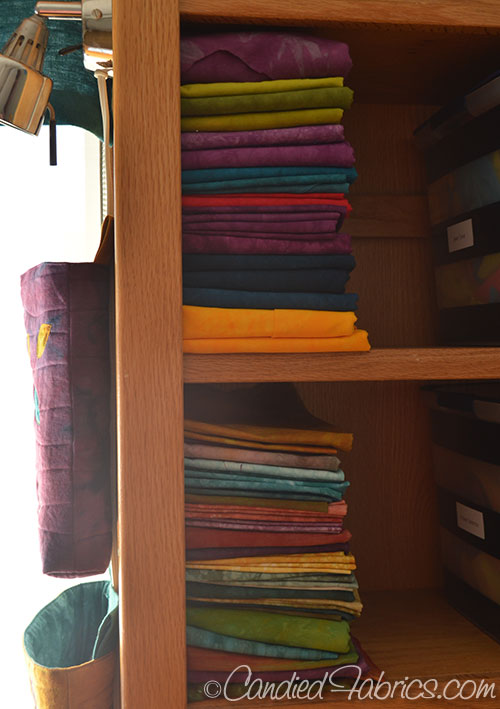
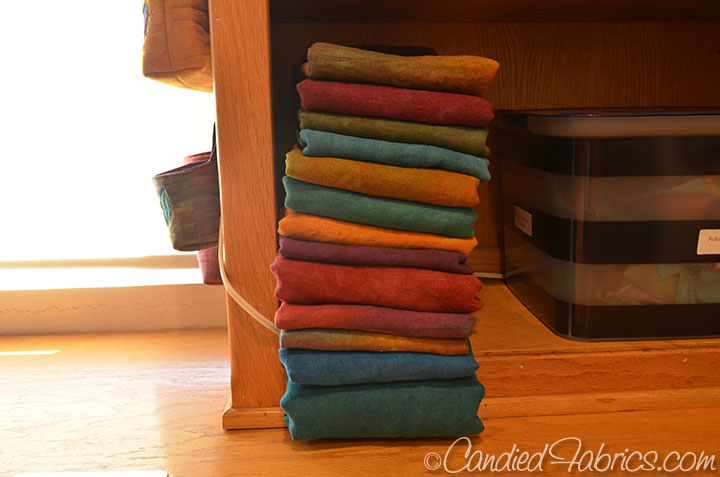
I’ve already jumped into using it, and it’s working really well. I really love having those palette stacks out where I can see them – it lets me know which fabrics I need to be dyeing without having to search in 3 or 4 locations. I am also inspired to come up with some big, scrappy quilt projects so I can use up a lot of the fabrics in those bins!
Something to think about, if you’re still reading…Organization is a process, not a product. I’ve lived in and used this studio for almost 10 years now, and how I work has changed during this time. For the moment, I’ve set things up about as well as I can without changing any of the built-ins or buying expensive organizers. I may change where things live a couple years from now, but I know that for now, this should serve the way I’m working NOW as best as it can!
I’ll leave with one last look at this awesome desk!!!!
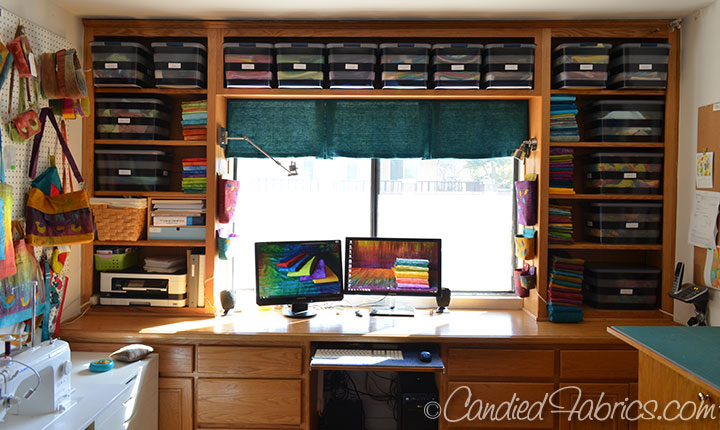
Yes, I know how lucky I am!
7 Responses
Fabulous! I know it was a lot of work but so worth it. I haven’t done that kind of reorg for about 10 years and I really need to do it again……I’m just not quite ready yet.
Love those baskets. Great ideas. Where do you store your thread?
THanks Connie. I store it in that white chest of skinny drawers next to the sewing machine. I’ve got a whole post about it here: https://www.candiedfabrics.com/2013/03/18/studio-cleaned-thread-organized/
Wow! Tidy, colorful and workable — what a great combination! 😉
I am inspired by the before and after. I love your sewing room. I never seem to find enough time before one project and the next to really clean it. But if you can do what you did in three days maybe I can do something with mine.
Great job. I’m a huge fan.
I’m moving in four months, so I’m trying to get organized for that, and looking forward to setting up a new studio.
Do you have a post about your dyeing space? I’d love to see that, too.
Thanks Mary! Although I don’t like moving, it is kind of fun to contemplate setting up a new studeio! I do, right here: https://www.candiedfabrics.com/about/process/dye-studio/